
Problem:
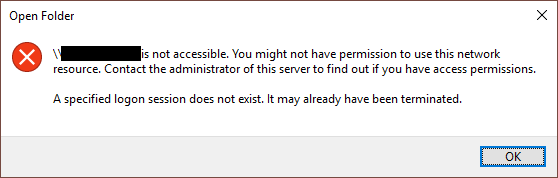
Since upgrading one of my machines to Windows 10 from Windows 7 I’ve been able to connect to any of the NAS drives on my home network. When attempting to access one of the drives via explorer I was presented with the following error message:
For search engines:
\\nas_drive is not accessible. You might not have permission to use this network
resource. Contact the administrator of this server to find out if you have access permissions.

A specified logon session does not exist. It may already have been terminated.
From a number of googles many people seem to suggest turning off the storage of passwords and credentials by disabling:
Network access: Do not allow storage of passwords and credentials for network authentication
This didn’t work for me and if it did, it would be, at best, a short term workaround.
It did make me start to wonder how to store credentials and which credentials to store for a NAS drive.
So, without further ado, to the solution…
Solution:
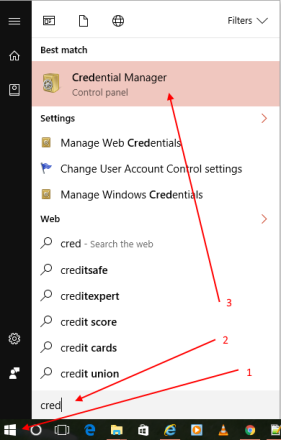
First, click the windows button [1] and start typing “Credential Manager” (I got to “cred”) [2] until you see the option for Credential Manager in Control panel [3]. Choose this option.
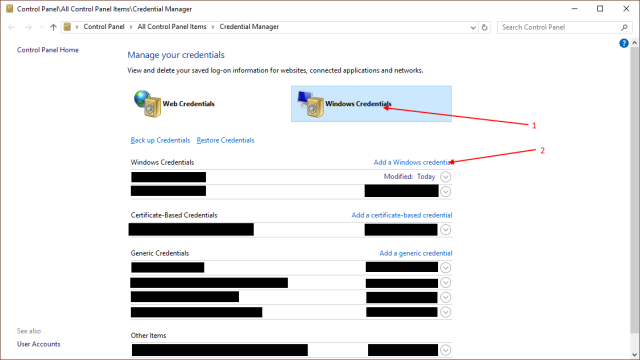
Next, within Credential Manager, select the Windows Credentials option [1] and then select the “Add a Windows credential” option [2].
In the Add a Windows Credential window, add the name or the ip address of the NAS drive [1], not forgetting the double backslash if you use the name. You should also add the username [2] and password [3] for the user setup on the NAS drive as required. If you haven’t set one up for the NAS drive yourself then try the default username and password. For example, for a D-Link ShareCenter, the default username is “admin” and the password is blank (see here). Once you’ve filled in the necessary details, click the OK button [4].

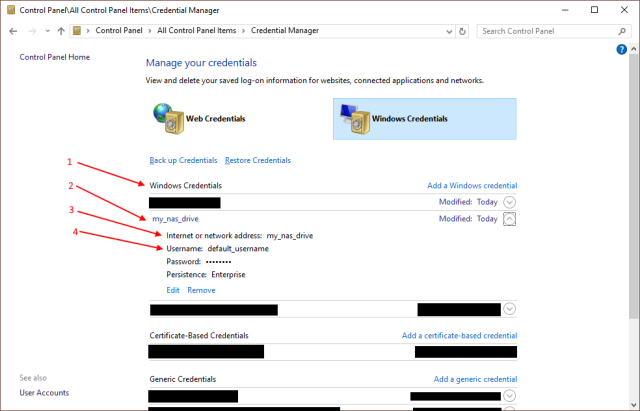
You should now see the newly added credential under the Windows Credentials heading [1]. You should see the name of the NAS drive [2] followed by the address (which is also the name) [3] and the specified username and the fact that there’s a password [4].
You’ll need to carry out this process for each NAS drive you want to access.
That’s it! You can close the Credential Manager window and you should now be able to connect to your NAS drive.
